Friday, June 12, 2015

How to back up minecraft PE via iTunes

Now if you are a parent who has young kids who are into minecraft you might come across some dramas about losing minecraft world whether it's accidental or when your iPad needs to be restored. iCloud and game centre cant back up minecraft. I saw some free software online that claims they can backup minecraft but it's a bit too tedious. 

After few dramas with children who made too many attempts to crack my iPad password, resulting our iPad to disable (unfortunately the only solution is to restore it in recovery mode), I finally found a way to restore it easy way. 

Now first i make sure I backup the iPad. It won't let me update and restore so I had to do the full recovery restore. I just backup to be safe but I later found out I can't restore from backup with the latest (today) backup. It will only select the 2nd last backup. 

This is what I tried and works. If you plug in your iPad to your PC and click the iPad icon on iTunes, then you'll see the various folders on left side panel e.g. summary, apps, movie, music. Click apps then you'll see list of apps on the window. Scroll to the bottom, there is a separate apps window with lesser apps. Usually my music and movie apps will show here. Then you click Minecraft icon (hopefully yours will show), the on the right hand side panel it'll show the folder e.g. games, internal. I select both and click "save to" then I saved them to my download folder (you can select wherever as long as you can find them). 

After that I do the full recovery restore. You can google how to do recovery restore, there are plenty of videos and instruction on that. Note: You can skip the recovery restore if yours works fine. Now, when I sync my iPad, I go back to the apps window on iTunes and find the minecraft icon same way as before. When you look at the bottom of right panel window you'll see "add to" and "save to", click "add to" this time. Then find that folder that you have saved before and click it. It will asked if you would like to replace the folder with same name and I click yes. 

My son is ecstatic that he didn't lose his world that he worked months on. And I once again become the hero mum :D


Monday, June 30, 2014

Elsa's costume

Here's Disney's Queen Elsa's costume. Took me about 8-10 hrs to finish. It took more time because  this costume is custom made and I have to make few changes as I made it. Next time i'll definitely use a stretchy white top and sew on the bodice (sparkly blue fabric on to the white top). If I do make another one i am going to glue on gemstones and use a velcro type dance costume fabric for the bodice too. I think that will make it much easier to sew. I have decided to make the dress into 2 parts by sewing the skirt separately.

So here are the finished photos:


Wednesday, March 5, 2014

Patio gardening

It seems like my interest has shifted from sewing to gardening. I started off in planting more resilient plants such as succulent. For someone who have killed a lot of plants in the past, succulent seems like a good choice. They don't require a lot of care. You can plant them in pots of any containers. I've planted mine in big bowls with no drain holes and some in pot with drain hole. You can mix some 1 part sand to 1 part soil mix or purchase a succulent soil mix. I prefer the more budget option that is to mix it myself. It's handy to keep sand mix as you can use it for propagating mix too.

A good trick i've learned is if your container doesn't have drain hole, put a layer of stones at the bottom. Some books that i have read also have a layer of carbon on top of the stone. I think this is to prevent smells if you ended watering too much water. I haven't put any carbon on mine and they seemed fine. Just make sure you don't water too often. I water when the soil is dry. Another good trick I learned is to cover top surface with pebbles. This helps retain moisture and also great for decoration.

It's good to have a mix of colour when you select plants for your terrarium. This bowl used to be a bird bath.  
1/2 wooden pallet
 Now this i have to give credits to my husband Rick. He cut the wooden pallet into have with a circular saw and we covered the area where the soil goes good quality tarp that we were going to throw out. You can use weed mat but in our case we decided to recycle the old tarp.


We love hanging plants on our patio. This is a mix of dwarf marigold. The colours are so vibrant. Love it! We also discovered that if u keep the dried flower, the seeds are in there. Spread the seeds and you'll see new seedlings out in just a week.

Our rustic galvanised pots just arrived. Here are some photos with plants. Trying to think of more usage for these rustic pots. May be a mini fairy garden next time.


Saturday, July 3, 2010

roll in outer fleece

i tried this ages ago and it didntwork quite well (partly due to my reluctance to put pin on my sewing project). i learned about thistechnique from a forum-Diapersewingdivas. i've tried to find the link but not very successful but if i found it, i will post here. I dont have time to upload step by step so hopefully this will make sense for some who already have some basic nappy sewing skill


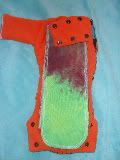
This is how the nappy looks on the wrong side. when u want the outer fleece to roll in, as u sew the legs u sew as picture above. u still sew normal seam allowance on the outer fleece but take a larger allowance on the inner layer microfleece. trim the excess microfleece when u are done.if u have a cotton outer and want the inner layer microfleece to roll out to prevent wicking u can do it the opposite way (a larger seam allowance on the outer layer fabric instead).

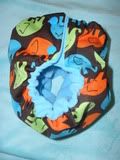
so when u flip it to the right side, this is how it looks (photo above).

The benefit of roll in outer fleece is to avoid wicking. and for sewing the roll in outer fleece this way, it gives your nappy a nicer finish. There's no excess microfleece gathering and less bulky.
This is how i attach elastics on legs (sew the both ends only). photos below are without sewing elastic casing.


I made casing for the elastic just to see what the difference is. Because my pattern is trimmer i find that it's much better to have the casing. Bubblebub AIO doesnt have casing for the elastic. i guess it works fine because the nappy is much wider than my pattern and the material is heavier than mine.


i just found another lady who have a tutorial on this on flickr. it's called Camocotton on PUL here's the link . Her tutorial is on roll out inner fleece to avoid wicking if you are using cotton material on the outer layer.


Saturday, March 20, 2010

the most uncooperative model


Here's me trying to capture some photos of my new creation. However, i dont think my model is too happy to work today

here's a better shots:
ally's wearing a tie dye yoga pants and she's getting creative and wore her fairy dress as a top. she might not look like typical model u see in the magazine or catologue even look a bit silly but i am happy that she's wearing mummy's creation.


Wednesday, March 17, 2010

2 nappies out of 1 nappy cut

I always find cutting nappies in full size is a waste of fabric. This is a good way of using your scrap fabric as well of making full use of nice expensive fabric ie printed PUL and minky when u make nappies.


This is what i get fr a 50cm x 50cm printed PUL. TWO NAPPIES!!


Basically when i cut the pattern, just cut the body and cut the wings seperately. i use another fabric for the wings section. It only takes a little more time to stitch the wings to the body but it's worth it especially when you are using a more expensive fabric ie printed PUL or minky. Dont forget seam allowance where you will stitch the main body of the nappy to the wings.


Tips of the day:
Do u find it hard to sew stretchy fabric ie PUL. i cut interfacing and stabiliser (i've heard people using baking paper too) into strips and lay it on top of the PUL when I sew. it's much easier to sew and it wont stretch the PUL.

Good Luck and enjoy sewing!!


Monday, March 8, 2010

my new hobby- TIE DYE

This is my new hobby, cant get enough of it. just love to see the colourful swirl and excited to see the outcome of mix of colours on the fabric.


bamboo velour fabric. havent decided what i am going to do with them yet.


transformed the boring white prefold and "lampin" to a more colourful fabric.


gave old nappy and clothing a new look.

i mostly use the presoak method which is soaking the fabric or clothing in soda ash solution then squirt dye solution onto the fabric.